
How to Fix HDMI Port on PS5: Safe Troubleshooting and Repair Guide
“By Airam Chandler”
Last updated: August 16, 2026
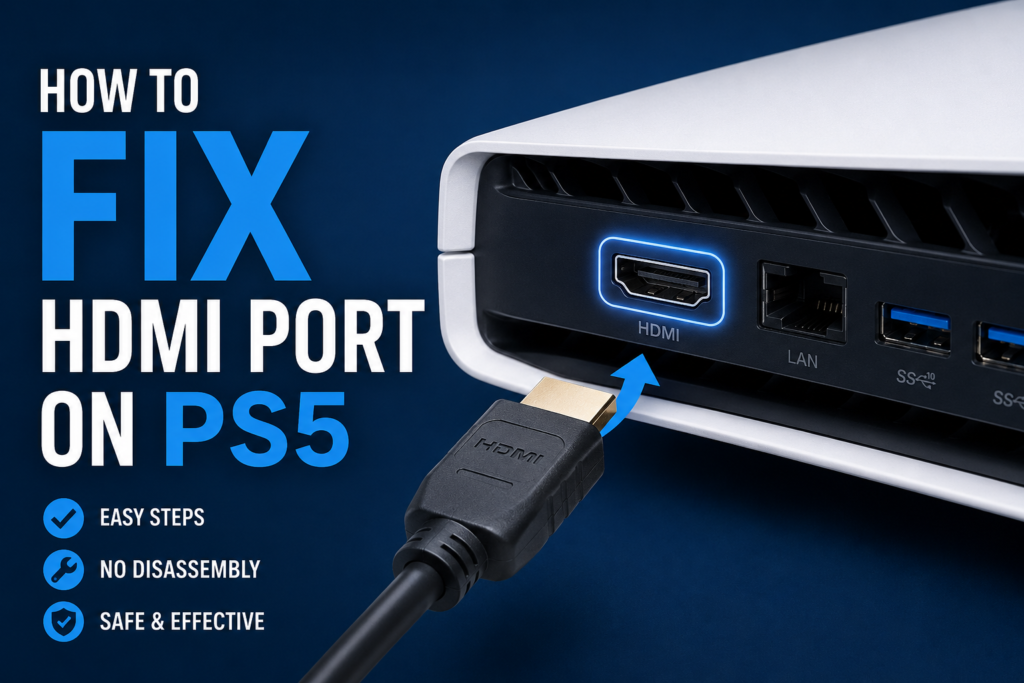
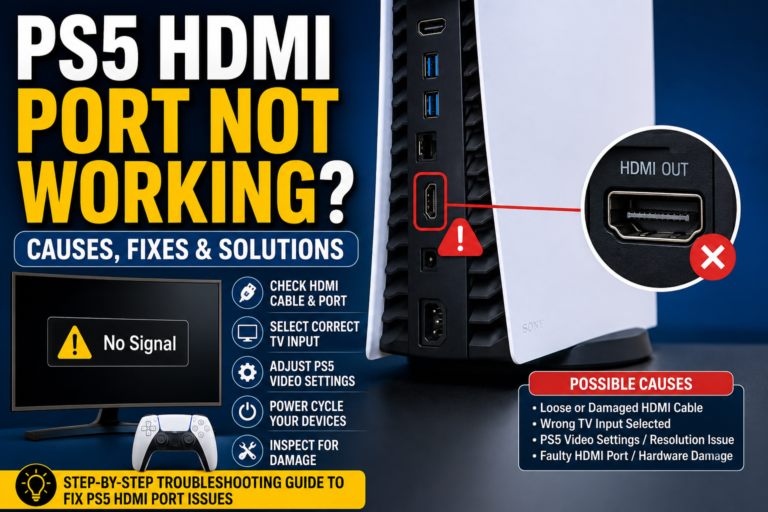
A PS5 HDMI problem may come from the cable, TV input, video settings, or the port itself. Start by testing another HDMI cable, another input, and another screen.
A physically broken, loose, bent, or pushed-in HDMI port usually cannot be fixed through settings. The connector is soldered directly to the PS5 motherboard, so replacing it requires board-level soldering skills and suitable equipment.
Quick PS5 HDMI Diagnosis
| What you notice | Best next step |
|---|---|
| Another HDMI cable works | Replace the old cable |
| Another TV input works | Troubleshoot the original TV input |
| The PS5 works on another screen | Check the first TV or monitor |
| Safe Mode appears | Change the video output settings |
| The picture cuts out when the cable moves | Turn off the console and stop using the port |
| Pins are bent, folded, or missing | Do not reconnect the cable |
| The port moves inside the console | Arrange a board-level repair |
| The port is pushed inward | Stop inserting the cable |
| The port looks normal but there is no picture | The console needs further diagnosis |
| The PS5 has no light or beep | Follow a power troubleshooting guide instead |
How to Fix HDMI Port on PS5 Port at Home?
You can fix some HDMI-related problems at home without opening the console.
These include:
- Replacing a faulty HDMI cable
- Selecting the correct TV input
- Trying another display
- Removing a receiver, soundbar, or capture card
- Changing the video output through Safe Mode
- Updating the PS5 system software
A physically damaged connector is a different problem. Bent pins, broken internal plastic, a loose metal housing, or a port that has been pushed into the console normally requires professional repair.
Do not assume the connector is broken only because the TV says No Signal. Check the cable, display, and settings first.
First, Confirm That the HDMI Port Is the Problem
Sony recommends checking both ends of the HDMI connection, trying another cable, using another TV input, and connecting the PS5 directly to the screen before arranging a repair. Devices such as soundbars, home-theater systems, HDMI switches, and capture cards should be removed during testing.

Check Whether the PS5 Powers On
Turn on the console and watch the power indicator.
A PS5 that powers on normally but produces no picture may have an HDMI connection, display-setting, or internal video-output problem.
A console that has no light, no beep, or turns off immediately probably has another fault. Replacing the HDMI port will not solve a power-supply or startup problem.
Try a Known-Working HDMI Cable
Use a cable that already works with another console, streaming device, or computer.
Connect it directly between the PS5 and the screen. Avoid adapters, switches, receivers, or capture devices during this test.
Insert the connector straight. Do not force it or push it upward to make contact.
Sony recommends the HDMI 2.1 cable supplied with the PS5 for its higher-performance features, but older HDMI cables can still work at supported output modes.
Try Another HDMI Input
Move the cable to another HDMI input on the same TV.
Remember to change the selected input with the TV remote. A working cable connected to HDMI 2 will not display while the TV is set to HDMI 1.
Test another device on the same TV input when possible. This helps identify whether the screen’s port is the problem.
Connect the PS5 to Another Screen
Try a different TV or monitor that is known to work.
If the PS5 displays normally on the second screen, the console’s physical port may be fine. The first screen may have an input, firmware, compatibility, or video-setting issue.
For the related PS5 display or hardware issue, see our PS5 no-signal troubleshooting.
If the PS5 shows no picture on either screen, continue with the checks below.
Remove Devices Between the PS5 and TV
Connect the console directly to the display.
Temporarily remove:
- AV receivers
- Soundbars
- HDMI switches
- HDMI splitters
- Capture cards
- Video converters
Sony lists a direct screen connection as a troubleshooting step for missing picture and sound.
Restart the PS5 and Display
Turn off the PS5 and screen completely.
Disconnect their power cables, wait, reconnect them, and test again. Sony’s current picture-and-sound guide recommends fully disconnecting both devices before powering them back on.
A restart may clear a temporary connection or display-handshake problem, but it will not repair bent pins or a connector separated from the motherboard. If the console also becomes unusually hot, makes loud fan noise, freezes, or shuts down unexpectedly, check our PS5 Keep Overheating guide before assuming the HDMI port is responsible.
How Do You Know Whether the PS5 HDMI Port Is Broken?
Use a flashlight to inspect the port without inserting tools.
A healthy connector should sit straight in the rear opening. Its internal pins should form an even row, and the plastic tongue should not look cracked or displaced.
| Healthy HDMI port | Possible physical damage |
|---|---|
| Connector sits straight | Port is tilted or pushed inward |
| Pins appear evenly spaced | Pins are bent, folded, or missing |
| Cable fits firmly | Cable feels unusually loose |
| Metal housing stays still | Port moves with the cable |
| Picture remains stable | Picture drops when the cable shifts |
| Internal plastic is centered | Plastic tongue is cracked or displaced |
Signs of Bent HDMI Pins
Stop using the port when you can see:
- Folded pins
- Pins touching each other
- Missing pins
- Pins pushed toward the back
- A cracked internal tongue
Do not insert the cable again to check whether it still works. The cable may push a damaged pin farther back or cause two contacts to touch.
Signs of a Loose HDMI Port
A loose connector may:
- Move inside the rear opening
- Sit at an angle
- Allow the cable to wobble more than normal
- Produce a picture only at one cable position
- Cut out when the console or table moves
The movement may come from broken mounting joints, cracked signal-pin solder, lifted copper pads, or damage around the rear housing.
What If the Port Is Pushed Into the Console?
Do not keep inserting the cable.
A pushed-in port may have separated from its mounting points or pulled electrical connections away from the motherboard. Continued pressure can turn a basic connector replacement into a more difficult pad or trace repair.
For the related PS5 display or hardware issue, see our HDMI repair price guide.
Turn off the console and arrange an inspection.
What If the Port Looks Normal?
A clean-looking connector does not prove that it works.
The problem may be:
- Cracked solder underneath the port
- A broken motherboard trace
- A damaged signal component
- A video-setting mismatch
- A faulty cable
- An internal HDMI circuit fault
Replacing a port that is not damaged may leave the PS5 with the same No Signal problem.
PS5 No Signal but the Port Looks Fine
Try Safe Mode when the connector looks normal, and the basic cable checks have failed.
How to Start a PS5 in Safe Mode
- Turn off the PS5.
- Press and hold the power button.
- Release it after the second beep.
- Connect the DualSense controller Checker with a USB cable.
- Press the PS button.
Sony’s Safe Mode menu includes Change Video Output, which can help with blank-screen problems.
Change the Video Output
From Safe Mode:
- Select Change Video Output.
- Select Change Resolution.
- Allow the console to restart.
- Choose a resolution supported by the TV or monitor.
If Safe Mode appears but normal startup does not, the HDMI connector may be working. The problem may instead involve the selected resolution or HDCP setting.
Update the PS5 System Software
Safe Mode also allows the system software to be updated through an internet connection or USB storage device.
Use only Sony’s official update file and instructions. Reinstalling the complete system software deletes console data, so it should not be used as an early HDMI troubleshooting step.
When Safe Mode Will Not Help
Safe Mode cannot repair:
- Bent connector pins
- A loose metal housing
- A cracked internal tongue
- A port pushed inside the console
- Lifted motherboard pads
- Broken electrical traces
If Safe Mode does not appear on any working display after testing another cable, the console may need hardware diagnosis.
What Can You Safely Fix Without Opening the PS5?
| Safe for most owners | Technician-only work |
|---|---|
| Replace the HDMI cable | Replace the connector |
| Try another TV input | Resolder the port |
| Test another display | Rebuild lifted pads |
| Remove a soundbar or receiver | Repair broken traces |
| Change video output in Safe Mode | Diagnose HDMI circuitry |
| Update official system software | Use hot-air rework equipment |
| Remove loose debris around the opening | Probe motherboard signals |
Removing Loose External Dust
Turn off the PS5 and unplug every cable.
Use a flashlight to inspect the opening. You may remove loose material sitting around the outside edge, but do not scrape the internal contacts.
Avoid:
- Metal pins
- Screwdrivers
- Knives
- Wet cotton swabs
- Contact cleaner sprayed directly into the port
- High-pressure air aimed close to the pins
Fibers, liquid, or a hard tool can create another problem.
Can You Fix Bent Pins Inside the Port?
Do not try to straighten the pins while the connector remains attached to the console.
The contacts are small and closely spaced. Moving one pin can cause it to touch another, detach from the internal plastic, or break when the cable is inserted.
A slightly changed pin position may appear to restore the image, but that does not mean the connector is stable.
A port with visibly damaged contacts should normally be replaced.
How to Fix a Loose HDMI Port on PS5
A loose port cannot usually be tightened from outside the console.
There is no external screw that secures it. The connector is held to the motherboard by soldered signal pins and larger mounting points.
Do Not Use Glue
Glue may hold the connector shell in one position, but it does not restore broken electrical connections.
It can also:
- Enter the connector
- Cover solder points
- Contaminate the motherboard
- Make later repair harder
- Hide the original damage
Do Not Hold the Cable at an Angle
Some users get a temporary picture by lifting the cable or placing an object underneath it.
This puts continuous side pressure on the connector. A loose joint may become a torn pad or broken trace.
Do not use:
- Tape
- Rubber bands
- Cardboard
- Cable ties
- A stand placed under the cable
If moving the cable changes the picture, stop using the port.
What the Proper Fix Requires
A technician normally needs to:
- Disassemble the PS5
- Remove the motherboard
- Inspect the port and nearby board area
- Remove the damaged connector
- Repair pads or traces when needed
- Fit a compatible replacement port
- Check the soldered pins
- Reassemble and test the console
The replacement part is soldered to the motherboard and requires board-level repair skills.
How Is a Broken PS5 HDMI Port Replaced?
This is an overview of the repair, not a beginner soldering tutorial.
The Motherboard Is Removed
The port is part of the main board rather than a small plug-in module.
The console must be opened far enough to remove the motherboard safely. Cables, shielding, cooling parts, and other internal components must be handled correctly during disassembly.
The Old Connector Is Removed
A technician uses controlled heat and soldering equipment to release the mounting points and signal pins.
Too much heat may damage the board or nearby components. Too little heat may cause the copper pads to tear when the port is lifted.
The Pads and Traces Are Inspected
Pads are the small copper contact points under the connector pins.
Traces are the thin electrical paths that carry signals across the motherboard.
When the port is pulled or pushed inward, some pads may separate from the board. A technician may need to rebuild the missing connections before installing the new part.
The New Port Is Installed
The replacement connector must match the console and board revision.
The technician checks:
- Port alignment
- Signal-pin contact
- Mounting-point strength
- Solder bridges
- Missing connections
- Nearby component damage
The Console Is Tested
Testing should cover more than the appearance of a basic picture.
Ask the shop to check:
- Stable video output
- HDMI audio
- Cable fit
- Flickering
- Picture loss when the connector is touched lightly
- 4K output when supported by its equipment
- Higher refresh-rate output when supported
Sony states that the PS5 supports HDMI 2.1 and 4K at 120Hz with compatible displays and settings.
For the related PS5 display or hardware issue, see our the HDMI cable included with PS5.
Why a New Port May Fix No Signal
The connector is only one part of the video-output path.
A PS5 may still show No Signal after port replacement when there is damage to:
- Motherboard traces
- Signal filters
- Protection components
- HDMI-related circuitry
- Power lines feeding the signal path
- Other board components
This is why diagnosis matters before replacing a port that looks normal.
A repair shop should inspect the connector and test the surrounding signal path rather than treating every black screen as the same fault.
Can You Replace the HDMI Port Yourself?
Technically, yes. It is not a good first soldering project.
The connector is inexpensive compared with the labor, but installing it requires board-level soldering and repair experience. iFixit lists the PS5 HDMI connector as a motherboard-soldered component that requires soldering and board-repair skills.
Skills Required
A successful repair may require experience with:
- Console disassembly
- Hot-air rework
- Temperature control
- Microscope inspection
- Fine-pitch soldering
- Pad reconstruction
- Trace repair
- Electrical testing
Tools Normally Required
A working setup may include:
- Correct screwdriver bits
- ESD-safe work area
- Hot-air rework station
- Temperature-controlled soldering iron
- Microscope or strong magnification
- Flux and suitable solder
- Board holder
- Multimeter
- Compatible replacement port
- Working HDMI cable and display
Why a Repair Kit Is Not Enough
A repair kit may provide a replacement connector and a few tools.
It cannot provide:
- Heat-control experience
- Board-repair skill
- The ability to rebuild missing pads
- Diagnosis of faults beyond the connector
- Equipment to inspect every soldered pin
A failed attempt may make the final professional repair more expensive.
Stop the DIY Attempt When
Do not continue when:
- The connector has been torn from the board
- Copper pads are missing
- The board is discolored or burned
- A previous repair is visible
- Small components have moved
- You cannot identify the correct replacement part
- You do not have proper magnification
- You have never completed board-level rework
Does Opening the PS5 Affect Its Warranty?
Sony’s PS5 hardware warranty in the United States and Canada covers material defects in materials and workmanship for one year from the original purchase date. Sony may repair the system or replace it with a factory-recertified console when a covered defect is confirmed.
Physical damage caused by a drop, forced cable, poor handling, or an unsuccessful third-party repair may not qualify as a manufacturing defect.
Check your proof of purchase and contact PlayStation Support before opening a console that may still be covered. Sony directs owners to its PlayStation Repairs service for hardware troubleshooting and repair arrangements.
How Much Does It Cost to Fix the Port?
A standard professional replacement in the United States often costs more than the connector itself because the job includes disassembly, soldering, inspection, reassembly, and testing.
The price can increase when the shop finds:
- Lifted solder pads
- Broken traces
- Damage from a previous attempt
- Internal HDMI circuit faults
- Shipping or diagnostic charges
For a full price breakdown, see our PS5 HDMI Port Repair Cost guide.
How to Find PS5 HDMI Port Repair Near You
Look for a shop that clearly offers microsoldering or board-level console work.
A business that repairs phone screens may not necessarily replace a PS5 connector in-house.
For the related PS5 display or hardware issue, see our use a laptop screen with PS5.
Ask these questions:
- Is the repair completed at this location?
- Do you repair lifted pads and broken traces?
- Is diagnosis included?
- Is the quote fixed or only a starting price?
- Will you ask before adding charges?
- What video modes do you test?
- How long is the repair warranty?
- What happens if the console cannot be repaired?
- Will I receive the same console back?
uBreakiFix currently advertises free diagnostic and cost evaluations for PS5 HDMI repairs, with a one-year limited warranty on the work and more than 700 US locations. Availability, pricing, and turnaround can still vary by store.
How Long Does the Repair Take?
A clean replacement may be completed faster than a job involving damaged pads or internal HDMI circuitry.
The timing depends on:
- The condition of the motherboard
- The shop’s workload
- Part availability
- Whether the repair is local or mailed
- Whether another failed repair must be corrected
Some repair chains advertise same-day completion for many jobs, but the console must be inspected before the timing can be confirmed.
PlayStation’s US hardware-support page currently warns that official service is experiencing delays and may have longer turnaround times.
How to Fix HDMI Port on PS5 Slim or PS5 Pro
Use the same troubleshooting order for every PS5 model:
- Test another cable
- Try another TV input
- Test another screen
- Connect directly
- Try Safe Mode
- Inspect the port
- Arrange professional diagnosis for physical damage
This applies to:
- Original PS5 Disc Edition
- Original PS5 Digital Edition
- PS5 Slim Disc Edition
- PS5 Slim Digital Edition
- PS5 Pro
The replacement connector must match the exact console and motherboard revision. Do not buy a part only because its listing says “PS5 compatible.”
How to Prevent Future Port Damage
Unplug the Cable Before Moving the Console
Never carry or reposition the PS5 while the HDMI cable is connected.
A sideways pull can damage the port even when the console moves only a short distance.
Leave Slack in the Cable
A tight cable places constant pressure on the connector.
Leave enough room behind the PS5 for the cable to bend naturally.
Insert the Connector Straight
Line up the plug before inserting it.
Do not push harder when it does not slide in normally. Check the direction and inspect the port for an obstruction.
Place the Console on a Stable Surface
Keep the PS5 where children, pets, chairs, and feet cannot catch the cable.
Remove Every Cable Before Transport
Disconnect the HDMI, power, USB, and network cables before packing the console.
Protect the rear panel so nothing presses into the ports during travel.
Final Repair Checklist
Before arranging a repair, confirm that you have:
- Tested a known-working HDMI cable
- Tried another TV input
- Tried another display
- Removed receivers and capture devices
- Attempted Safe Mode when the port looks normal
- Inspected the connector with a flashlight
- Stopped using it if the pins or housing are damaged
- Checked the warranty status
- Requested a written quote
- Asked what the shop will test after repair
FAQS
How do I fix the HDMI port on my PS5?
Start by testing another cable, input, and display. Try Safe Mode if the port looks normal. A loose, bent, or pushed-in connector normally needs professional motherboard-level repair.
For the related PS5 display or hardware issue, see our PS5 cooling troubleshooting.
Can I fix a PS5 HDMI port without opening the console?
You can fix cable, display, and video-setting problems without opening it. A physically damaged connector cannot normally be replaced from outside the console.
Can I repair the port at home?
Only attempt the motherboard repair when you already have hot-air rework, fine soldering, and board-repair experience. It is not a beginner repair.
How do I fix a loose HDMI port on a PS5?
Do not glue it or hold the cable at an angle. Turn off the console and arrange an inspection. A proper repair may involve replacing the connector and rebuilding damaged board connections.
What should I do if the port is pushed in?
Stop inserting the cable. The connector may have separated from its mounting joints or damaged the motherboard pads.
Can I use glue to secure the connector?
No. Glue does not repair the electrical connections and may contaminate the connector or motherboard.
Should I hold the HDMI cable at an angle?
No. A temporary picture does not mean the port is fixed. Side pressure can make the damage worse.
Can Safe Mode fix an HDMI problem?
Safe Mode may fix an unsupported resolution or HDCP setting. It cannot repair physical connector damage.
Why does my PS5 show No Signal?
Possible causes include a faulty cable, incorrect TV input, incompatible video setting, damaged connector, or an internal HDMI signal-path fault.
Can I clean the PS5 HDMI port?
You may remove loose external debris while the console is off and unplugged. Do not scrape the contacts or insert wet or metal tools.
Is a PS5 HDMI repair kit enough?
No. The job also requires suitable soldering equipment, magnification, heat control, testing tools, and board-repair experience.
Does port replacement require soldering?
Yes. The connector is soldered directly to the motherboard.
Can it be replaced without replacing the motherboard?
Yes, a qualified technician can often replace the connector on the existing motherboard. Damage beyond the port may require extra board work.
Why does the picture work only when I move the cable?
The connector, solder joints, or cable may be damaged. Stop moving it and test another cable. If the problem continues, arrange an inspection.
Will a new port always fix No Signal?
No. A fault in the video settings, motherboard traces, or HDMI circuitry can produce the same symptom.
How much does the repair cost?
The cost depends on whether the job is a clean replacement or also involves damaged pads, traces, or circuitry. See our separate PS5 HDMI repair-cost guide for a full breakdown.
How long does the repair take?
A clean local repair may be faster than pad, trace, or circuit work. Mail-in shipping and shop workload also affect the timing.
Can Sony repair a broken HDMI port?
PlayStation Support can assess the console and direct you through its repair process. Warranty coverage depends on the cause of the damage and the applicable terms.
How do I fix the port on a PS5 Slim?
Use the same cable, display, direct-connection, Safe Mode, and physical-inspection checks. A physically damaged PS5 Slim port still requires a compatible part and motherboard-level repair.
Will a repaired port support 4K at 120Hz?
A correctly repaired connector and healthy signal path should retain the console’s supported output features. The PS5 supports HDMI 2.1 and 4K at 120Hz with compatible equipment. Ask whether the shop can test those modes.



One Comment