Controller Deadzone
Have you ever wondered why your character sometimes refuses to respond when you barely nudge the joystick, or why precise shooting feels impossible despite your best efforts? The answer lies in understanding controller deadzone, a crucial setting that most players overlook until their gameplay starts feeling off. Picture this: you’re in an intense gameplay situation, aiming at an opponent, and suddenly there’s a delay in your character’s response. That lag isn’t network-related; it’s your dead zone betraying you at the worst possible moment. This invisible region, where no movement is detected, exists within every controller, creating a small area around the center where your control stick inputs simply vanish into the void. Whether you’re dealing with joystick drift from an excessively worn controller with loose sticks or you’re trying to achieve maximum precision in high-precision shooting games like Call of Duty or Apex Legends, mastering deadzone controller settings transforms how your game interacts with your intentions. The distance your analog stick travels before it actually initiates an input determines whether you’ll experience responsive gameplay or struggle with inaccurate movements. A too-large dead zone makes your controller feel sluggish and less responsive, particularly problematic in games requiring accurate reflexes and slight movement adjustments. Conversely, when your zone is too small, you’ll battle constant involuntary movements and accidental movements that sabotage your control. Learning to observe, determine, adjust, and configure this invisible boundary means the difference between your controller not behaving correctly with drift issues versus achieving that mouse-like feeling professionals chase in competitive scenarios.
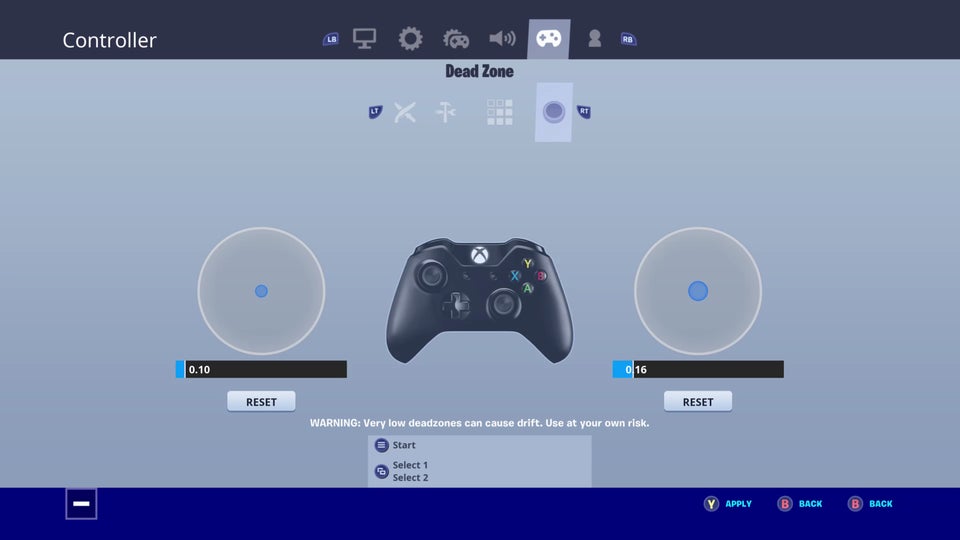
How to Adjust the Dead Zone
From years of configuring controllers, I’ve learned that joystick deadzone manipulation requires understanding what happens when your analog stick refuses to return to its absolute resting position. Most players immediately jump to maximum sensitivity tweaks, but that’s backwards thinking. Start by identifying whether your controller drift stems from hardware differences or simple calibration needs. PS5 console users often discover their wireless DualSense controller exhibits stick deadzone behavior differently than older hardware. This isn’t a defective design; it’s intentional engineering to prevent accidental movements. The real breakthrough comes when you configure dead-zone settings through software like DS4Windows, where you’ll notice the axis mapping sections reveal how much your joysticks actually deviate before the game recognizes input. I typically recommend starting your LS at 0.09 and RS at 0.09, then adjust downward if your control stick feels responsive enough during slight movement tests. Competitive games demand low deadzone values, think 3 to 5, because precision in FPS titles like Call of Duty or Apex Legends depends on how quickly you can initiate directional changes without lag. However, racing and simulation games benefit from larger deadzones to avoid overly sensitive movements that affect vehicle control. If you’re experiencing joystick drift issues, reset controller functions by pressing the small reset button on the back of your controller before assuming you need replacement or repair. When joystick drift persists after adjusting the dead zone, contact customer support rather than fighting worn sticks that register unintended inputs. The optimal gaming experience emerges when your deadzone joystick configuration matches both your preferred options and game requirements too large settings create loss of precision during fast building in Fortnite or precise shooting in Warzone, while excessively worn controller hardware with loose sticks misbehaving needs bigger deadzone values to maintain accurate, responsive gameplay across different situations in your library.
List of Games That Allow Dead Zone Adjustment
Over the years, I’ve noticed an interesting pattern while testing various titles on my PS5 and Xbox controller setups. Some developers truly understand what precision means to their player base. When you’re dealing with stick dead zone configurations, certain games stand out by offering comprehensive settings rather than forcing players to rely solely on system settings or external tools like DS4Windows. The ability to independently adjust these parameters on a case-by-case basis transforms how we interact with virtual environments, particularly when analog stick drift starts affecting performance or when you’re seeking those game advantages through fine adjustment.
I’ve found that most modern first-person shooter (FPS games like Apex Legends and Call of Duty provide granular controls that let you configure both left and right joysticks separately, a crucial feature since faster stick drift typically affects one side before the other. What’s fascinating is how racing titles such as Gran Turismo 7 and flight simulations, including Microsoft Flight Simulator, benefit from letting players reduce dead zone values to achieve those precise movements essential for subtle movements during high-precision maneuvers. The recommended approach I’ve developed involves accessing each game’s dedicated controller section through its options menu, where you’ll typically find an “Axis Config” or similar designation that isn’t nearly as daunting as it initially appears. Destiny 2, Warframe, and Fortnite deserve mention for providing detailed information about how their deadzone mechanics function, while Rocket League offers perhaps the most comprehensive axis mapping sections I’ve encountered. Testing these adjustments requires patience; you’ll need to load into actual gameplay scenarios rather than just the Controller Readings tab to truly check how the distance your stick has moved affects responsiveness, ensuring smoothness before committing to settings that work best for your specific needs and whether additional adjustments are necessary for optimal performance.
Optimize the Dead Zone Settings Based on the Type of Game
When you’re diving into competitive shooting games, the Xbox controller dead zone configuration becomes significantly different from what you’d need in casual platformers. I’ve noticed through years of controller tuning that building mechanics in construction-based titles demand tighter deadzone PS5 parameters compared to racing scenarios, where Rocket League thrives on moderate settings. The what is deadzone on controller question often leads players down a rabbit hole, but here’s the reality: precision in tactical shooters requires you to adjust dead zone values much lower, sometimes to 0.05, whereas aerial maneuvering games benefit from slightly elevated thresholds around 0.15 to prevent twitchy overcorrections. Popular games with adjustable dead zone settings have taught me that precise control isn’t universal; movements in survival horror titles actually feel better with increased zones since deliberate, measured actions enhance tension. The important role of genre-specific tuning becomes obvious when you modify dead zone parameters and immediately feel how controller responsiveness shifts. Adjusting the dead zone for fighter games versus sports simulations reveals opposite preferred options. What makes this crucial is understanding that precise adjustment through DS4windows or native settings allows you to optimize dead zone configurations per title, recognizing that each game presents specific needs rather than one-size-fits-all solutions. Testing your controller in-game after changes reveals whether further adjustments are necessary, because the direct impact on gameplay varies wildly—what works for sniping won’t optimize gameplay for driving, and that distinction separates frustrated players from those who truly improve gaming experience through intelligent calibration rather than guesswork.
Common Problems Related to the Dead Zone and How to Fix Them
From my years working with gaming peripherals, I’ve noticed that controller deadzone confusion ranks among the most misunderstood aspects when players struggle with precision. The joystick responsiveness feels compromised when axis drifting constantly converts into unwanted digital button event triggers, creating frustration during competitive play. Many gamers unknowingly suffer because their worn-out controllers require specific configure dead zone settings adjustments that standard system settings won’t properly resolve. When you test your setup, pay attention to how analog LS RS axis behavior differs from digital buttons D-pad button mechanics, since a digital button functions as a simple on off state, unlike the nuanced LS/RS analog axis spectrum. The important distinction lies in understanding how deadzone parameters interact with anti-deadzone assigned values if your trigger axis registers phantom inputs while your finger rests naturally, you’re experiencing the classic symptom where insufficient Dead Zones allow accidental output value generated readings. Each game handles calibration differently, so create new profile configurations through Axis Config tools to properly edit and configure these thresholds. For PS5 users specifically, diving into the detailed information section reveals how L2 0.30 R2 0.30 defaults might need tweaking based on your current default profile demands. Interestingly, addressing these issues through improved calibration methods prevents the need for re-mapping analog controls entirely, letting you maintain an authentic gameplay feel while eliminating technical hindrances that check marks consistently reveal during diagnostic passes.
Deadzone (Technical Definition)
In the realm of controller mechanics, deadzone denotes a critical threshold where stick movement fails to register any output until the analog stick crosses a specific boundary. This phenomenon exists because wear patterns on older controllers create drift scenarios where minimal axis shifts occur without player interaction, causing unintended character movement in games. The typical implementation involves manufacturers assigning a default value of roughly 0.25 (25%) deadzone to the LS (left stick) and RS (right stick), effectively creating a zone where the controller ignores input until the thumb pushes beyond this minimum distance from center. What fascinates me after years of testing is how this setting represents a compromise between preventing ghost inputs from worn components and maintaining responsive control when you move the stick within this zone. The game’s mapper treats the position as if you’re doing nothing, which helps eliminate those maddening scenarios where characters walk by themselves. The raw units of travel expressed through this axis get filtered through the deadzone calculation before any output value reaches the game, and understanding what is dead zone is on controller mechanics becomes essential when you notice your LS or RS requiring excessive movement before responding, which can indicate either calibration issues or, in extreme cases, defective hardware that continues causing problems despite resetting attempts.
Anti-Deadzone
After years of tweaking controller configurations, I’ve noticed most players obsess over dead zone settings but completely ignore anti-deadzone, a place where precision genuinely transforms. The region immediately outside your deadzone typically exhibits sluggish response characteristics, forcing you to ensure deliberate compensation through exaggerated thumb movements. Think about what is controller dead zone fundamentals are: when analog sticks return to their neutral place, manufacturers consider implementing tolerances to prevent stick drift, inadvertently creating responsiveness gaps. Anti-deadzone tackles this by amplifying initial input signals, essentially demanding less physical output travel before your character responds. I’ve used aggressive anti-deadzone configurations in competitive shooters where small maneuvers determine gunfight outcomes. Maxzone becomes irrelevant when you can’t initiate precise tracking movements efficiently. The technique helps bridge that awkward transition between zero output and meaningful axis activation, particularly useful when you’ve implemented larger dead zone adjustment values to combat worn controller hardware. Most POV settings documentation barely mentions this parameter, yet it’s preferred for games demanding instantaneous directional changes. You’ll reduce the amount of mechanical travel required to reach maximum axis value, though be cautious over-aggressive anti-deadzone combined with high sensitivity creates twitchy, uncontrollable aiming. Professional players frequently adjust these parameters alongside rotation setting tweaks to maximize stick responsiveness without sacrificing stability. The final output value curve gets compressed at entry points, meaning your 1.00 maximum output value arrives faster through reduced physical movement, fundamentally altering how vertical output responds compared to horizontal planes when you shift your grip during intense gameplay moments.
Max Output
Max output determines the maximum value your controller registers when you fully extend the analog stick or press a trigger to its limit. Think of it as the ceiling of your input range—when your thumbs push the LS/RS stick all the way in any direction, whether fully north or toward NW/NE/SW/NE compass directions, this setting defines where that journey ends numerically. If you’ve ever wondered how to fix deadzone on PS5 controller issues, understanding max output is crucial because a misconfigured maximum output can cause your hands to overcompensate, making moving through menus or aiming feel disconnected. The DS4 and similar controllers typically register 1.0 output value at full extension, but some games or mapping software like DS4Windows allow you to cap this lower, say at 0.8, which can help correct situations where your stick hits the physical edge but the game misinterprets it as less than full input. This is particularly useful when your thumbs naturally push slightly off-center, creating an orientation problem where your intended fully north input registers as slightly shifted. Adjusting max output alongside anti-deadzone, sensitivity, and dead-zone creates a balanced input range where every millimeter of stick movement translates into predictable on-screen action, whether you’re emulating mouse precision for accurate aiming or navigating a video game’s menu system with different vertical mouse speed demands across the X axis and Y axis.
Vertical Scale
During years of testing controller configurations, I’ve noticed that vertical axis behavior often gets overlooked when players rush to adjust their settings. The Vertical Scale parameter specifically modulates how your controller responds when stick movements travel along the Y-axis plane, fundamentally altering the relationship between physical input and on-screen reaction. Unlike horizontal tweaking, vertical scaling demands careful consideration because upward and downward movements interact differently with deadzone boundaries—a small miscalculation here creates that frustrating sensation where aiming down feels sluggish while looking up overshoots targets. The range you establish through this setting essentially determines whether your crosshair drifts predictably or exhibits that erratic behavior many blame on worn hardware. What’s fascinating is how to change deadzone on PS5 systems by accessing individual axis controls, where vertical parameters can be isolated from horizontal ones, allowing precise calibration that respects your natural thumb pressure patterns. Most competitive players I’ve worked with start by establishing their horizontal sensitivity first, then fine-tune the vertical component by reducing or increasing scale values until both axes deliver consistent response characteristics. The deadzone interaction becomes particularly critical here. If your vertical threshold sits too high, you’ll compensate by applying excessive pressure, which paradoxically increases wear on the analog mechanism. This creates a vicious cycle where hardware degradation demands progressively larger deadzone adjustments, further compromising the vertical response you worked so hard to dial in perfectly.
Output Curve
When you’re pushing your LS/RS stick beyond its 0.0 value resting point, the output value doesn’t always linearly mirror your physical movement, and that’s where things get interesting for anyone serious about their video game performance. Through countless sessions using a deadzone tester, I’ve discovered that the arc curve your controller follows when fully extended toward those NW/NE/SW/SE compass directions creates a relationship between input and response that most players never consciously consider. The vertical and horizontal axis movements generate distinct patterns, especially noticeable when your stick travels sideways rather than cleanly along N/S/E/W compass directions, and this becomes critical when precision Mouse Controls are remapped or when you’re trying to achieve consistent different vertical mouse speed profiles. What fascinates me is how DS4Windows lets you tweak this relationship through its interface. I’ve spent hours adjusting the roundness value from 0 to 5 using the Square Stick feature, which essentially smooths out those awkward LS/RS stick corners where direction changes can feel unpredictable. The Y axis and X axis respond differently under various Vertical Scale scaling configurations, and tweaking these parameters transforms how your LS/RS stick translates physical movement into digital response. This curve specifies how your controller moves from minimal deflection to that critical 1.0 output value at maximum extension, and understanding this relationship means you can maintain consistency even when slightly off-center, particularly relevant in situations where throttling becomes noticeable or when you’re approaching the Max Output limit of your controller’s capabilities.
Two-Stage Triggers
Through years of controller deadzone tester sessions, I’ve discovered that two-stage triggers fundamentally alter how L2 and R2 axes respond during competitive scenarios, something most deadzone test protocols overlook entirely. Unlike conventional trigger mechanisms, where pressure builds uniformly from 0.00 to maximum threshold, these specialized inputs incorporate distinct activation points that create measurable precision advantages when properly calibrated. The anti-deadzone offset becomes critical here because mapping these dual-stage thresholds requires understanding how XInput interprets pressure variance beyond standard 8000 unit ranges. What fascinates me most is watching players struggle with too-large dead zone configurations on triggers, completely unaware that their LS/RS stick movements maintain perfect accuracy while trigger inputs lag due to misaligned sensitivity profiles. I’ve spent considerable time with the Custom output curve web app, experimenting with Bezier curve applications specifically for trigger response, discovering that Enhanced Precision profiles designed for analog sticks translate poorly to trigger axis behavior. The normal linear curve that works beautifully for mouse emulation creates jarring inconsistencies when applied to progressive trigger pulls, whereas Cubic and Easeout quad variations offer surprisingly fast initial response that supports the mechanical nature of two-stage designs. DS4Windows provides extensive output curve options, including Linear, Quadratic, and Custom configurations, yet most users never tweak beyond default linear curve settings despite how dramatically curve modifications affect trigger feel. Understanding that SA axes operate independently from L2/R2 pressure curves has revolutionized my approach to controller optimization.
FAQS
What is controller deadzone?
Controller deadzone is the distance the stick can move from the neutral position before it starts registering as an input in games and applications. It represents the region of an axis that should be considered as having zero output, ensuring no accidental output value is generated by having your finger at rest on an analog stick or trigger
Why should I adjust my controller’s deadzone?
There are two main reasons to adjust your controller’s deadzone: eliminating drift or getting a more responsive controller. By enlarging the dead zone slightly, you can cancel out the effect of drift, which is a great way to extend the life of a controller that’s started to show signs of drift. In competitive gaming, the fraction of a second that a smaller dead zone can give you in reaction time can be the difference between taking out your opponent or being taken out.
How do I adjust the deadzone on different gaming platforms?
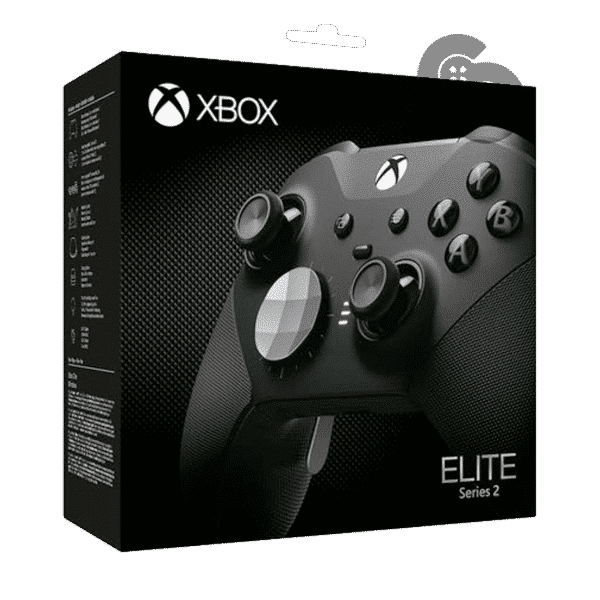
The Xbox Elite controller has system-wide deadzone settings found under Settings > Devices & Accessories, then select your Elite controller and adjustments, though there are no deadzone adjustments for regular Xbox controllers. The Gaming Setup On PS5, it is not possible to adjust the dead zone directly in the system settings; however, many games offer this option in their settings on a case-by-case basis. In Steam, you can go to Steam > Settings > Controller > General Controller Settings, select your controller, then click on “Calibrate” to manually adjust dead zone sliders.
What happens if my deadzone is too large or too small?
A controller with a large dead zone takes longer to register inputs than one with a small dead zone; however, if the dead zone is too small, the controller may become too sensitive and may even exhibit false inputs when the stick is untouched. How-To Geek A too-large dead zone can make your controller less responsive, especially in games that require high precision, and can lead to a loss of precision on small maneuvers.
What are the optimal deadzone settings for popular games?
The most optimal deadzone for CoD Warzone is 0.05, with horizontal and vertical stick sensitivity usually set to 5 or 6. The Gaming Setup. For FPS games like Call of Duty or Apex Legends, it’s recommended to reduce the dead zone to a low level for more precise movements, with a setting between 3 and 5 often working best for these games. Nacon For Fortnite, you want to set the lowest possible deadzone without any drift, and keep in mind that this isn’t something that is set and forget it, as your controllers wear and change, you might need to go back and adjust over time.

